|
The tutorial is very simple and it will help you to be able to write protect any flash drive. This helps when your device is stolen or somebody wishes to delete your sensitive material without you knowing about it. The tutorial will concentrate on (1) How to write protect a flash drive; (2) How to remove write protection. The flash drive I will be using as a test device is a 8GB USB 2.0 Pen Cap Apacer AH322 Flash Drive & the operating system I will be using is Microsoft Windows 7 Ultimate x86.  Enable Write Protection:Start this process by plugging your USB flash drive into and open USB port on your laptop or desktop computer. Wait for your computer to successfully read the new device and follow the steps below:
The following window below will appear  - Type the following: diskpart Hit enter - Type the following: list disk From this short menu you will see a detailed list of storage devices plugged into the computer including the flash drive and the main storage drives for the operating system. What you want to identify here is the flash drive. Below I have identified the test flash drive. 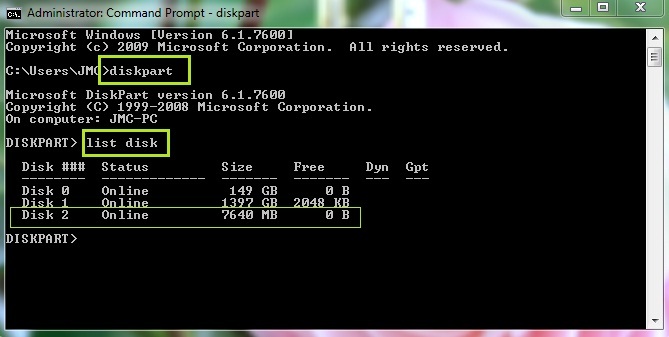 According to the list in the above image, the flash drive I am using is identified as: Disk 2 with a size of 7640 MB. Knowing that the flash drive is an empty 8GB drive & being aware of the other two drives I can safely assume that Disk 2 refers to the flash drive. - Type the following: select disk 2 You will receive a confirmation message stating: Disk 2 is now the selected disk - Type the following: attributes disk set readonly You will receive a confirmation message stating: Disk attributes set successfully Below is an example of the above mentioned.  To test if your flash drive has been write protected, head over to Computer, find your flash drive, open the contents up and try deleting any file to test. You will receive an error like the one below. 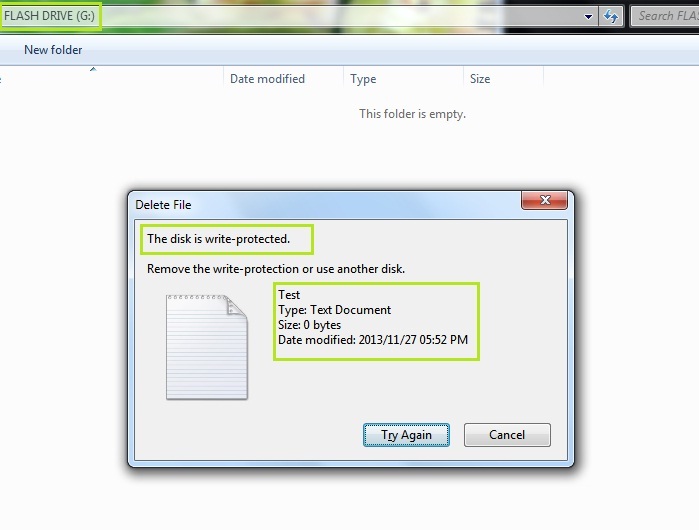 Now you have successfully write protected your flash drive. Nobody will be able to Delete, format or remove any files. - Type the following: exit This will close up the section of disk part used to protect devices. You may now exit the command prompt menu. Remove Write Protection:If you wish to remove the write protection from your flash drive follow the steps below.
 - Type the following: diskpart Hit enter - Type the following: list disk You will once again see a detailed list of storage devices plugged into the computer including the flash drive and the main storage drives for the operating system. Identify the flash drive. Below I have identified the test flash drive again. 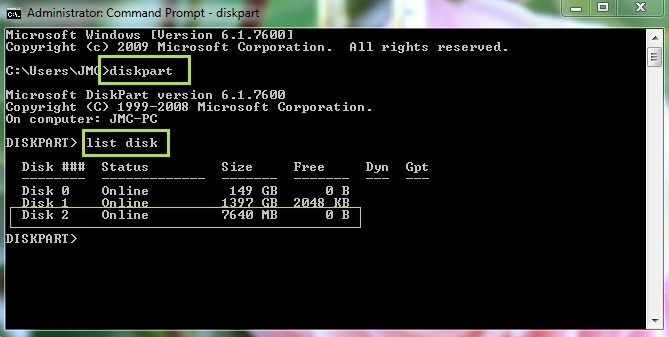 - Type the following: select disk 2 You will receive a confirmation message stating: Disk 2 is now the selected disk - Type the following: attributes disk set readonly You will receive a confirmation message stating: Disk attributes set successfully Below is an example of the above mentioned. 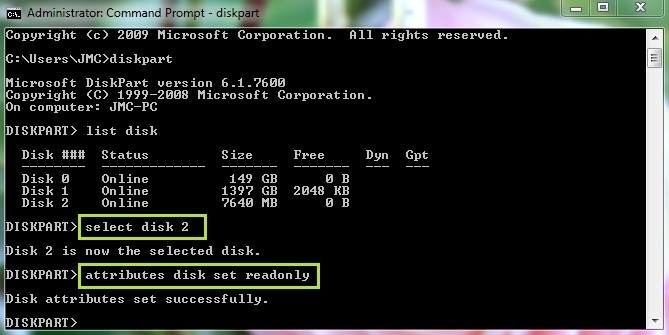 - Type the following: attributes disk clear readonly You can once again head to Computer, find your flash drive and you may now delete anything you wish. - Type the following: exit You may now close the command prompt window. 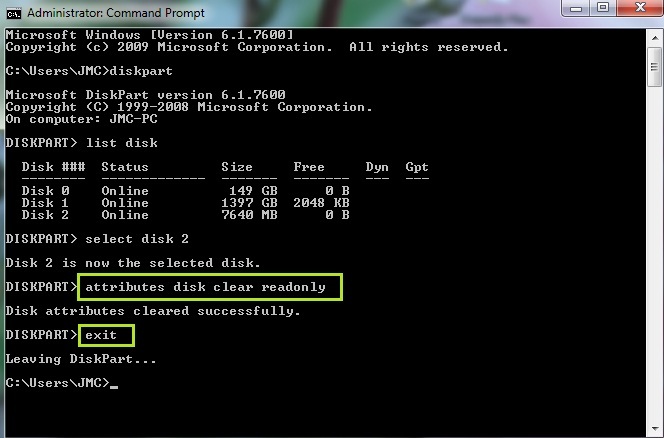 This concludes the tutorial. I hope you find this useful. If you have any issues, feel free to comment on this post and/or send me an email.
0 Comments
|
Archives
October 2022
Categories
All
|
 RSS Feed
